The Different Types of Prototyping and Their Individual Purpose
Posted on Jul 25, 2017 | 0 comments | Connect with Nancy Smith on Google
Do you want to learn how to avail of a design process that is more practical, accurate, and efficient? Do you want to avail of a manufacturing facility whose prototyping technique has been honed and perfected so that you don’t waste time, money, and resources in the early stages of the development of your new product?
For the above questions to be resolved advantageously for you, it is crucial for you to know the basics of the prototyping process and what the different types of prototypes are.
When it comes to design, using prototypes is not uncommon. On the contrary, the use of prototypes is actually a practical method that a lot of designers and manufacturers use when developing new products. However, the term “prototype” actually has different meanings for different industries and disciplines, though they serve pretty much the same purpose.
What is the basic definition of a prototype?
According to Merriam-Webster, a prototype is a first full-scale and usually functional form of a new type or design of a construction.
But because the term “prototype” can mean many things to different disciplines, they usually come in many different forms. From an IT or software developer’s perspective, for instance, a prototype can be in the form of software application, while from the product development engineering standpoint, a prototype can be an original model that is then used to make a pattern of.
Regardless of the different forms that prototypes take in the design process, they are crucial in the planning and development stages. The following are the different types or stages that you need to consider when letting manufacturing centers develop your first prototype:
The Different Prototype Phases in the Product Development Process
1. The Storyboard/Breadboard Prototype (Concept Prototype)

Far from the 3D prototyping stage, the storyboard or breadboard prototype, also known as concept prototype, is essentially a working model of a particular concept or idea. It is often used to illustrate the concept and its overall vision in relation to functionality, structure, operational characteristics, identity, and design.
A concept prototype will basically show how the concept product will interact with the user and the role it will serve within an environment. As far as the level of detail is concerned, it usually varies depending on the application or the intended purpose of the product.
In most cases, a storyboard prototype doesn’t have to look good or work well. There’s less focus on aesthetics, as long as it can effectively show the basic functions of the concept.
2. The Visual Prototype
This type of prototype is an actual representation of the concept product in 3-dimensional form. It serves to provide an accurate representation as to how the finished product will look and feel. This is a physical model that is used for testing a particular design.
Having a visual prototype will allow designers and fabricators to get a clear visual of the product concept. As an accurate representation, the prototype will enable manufacturers to examine the shape and size of the product, thus allowing them to make minute changes or enhancements where necessary. Basically, it serves as a guideline for creating an efficient design.
In most cases, however, a visual prototype usually lacks its full functions. In other words, it’s not yet fully functional and merely serves as a 3D representation of the product idea, which can be very useful to both designers and fabricators.
3. The Proof-of-Concept Prototype

The proof-of-concept prototype will allow designers, developers, and their clients to explore the implementation phase of the product concept. The prototype will essentially demonstrate how the concept will work and serve its main purpose. In essence, the proof-of-concept prototype will explore the functionality of the product.
But since this type of prototype does not necessarily tackle the aesthetics or the appearance of the product, it usually doesn’t look pretty. In some cases, it will look more like Frankenstein’s monster, composed of different materials put together based on accessibility and cost.
The main purpose of this kind of prototype is to illustrate the potential of the product concept in terms of functionality and application. If the visual prototype shows the outside of a product concept, a proof-of-concept prototype will show off what’s inside the product and how it works.
4. The Presentation Prototype

The presentation prototype combines the key elements represented by both the visual prototype and the proof-of-concept prototype. To put it bluntly, it essentially explores the look and feel of the product, as well as its functions and implementation. In the product development process, this is the prototype phase where the concept becomes more real and closer to the finished product.
In many cases, the presentation prototype is often used as a promotional tool to impress the bigwigs, potential investors, and clients. It’s also able to provide a better sense of the product as it inches closer to production.
Those are the four different stages of prototypes that most designers and manufacturers are familiar with. But how do you go about creating a prototype? Continue reading to find out.
The Different Techniques Used in Prototyping
Understanding the product development process includes familiarizing the most common prototyping processes. These are the five techniques that anyone interesting in practical and efficient design.
1. SLA Prototype or Stereolithography
For those who want things fast and efficient, SLA is the best option. This technology works by creating parts in a layer-by-layer process. It is capable of producing the most accurate prototypes. Also known as stereolithography apparatus and resin printing (because it uses resin and ultraviolet laser), SLA’s biggest advantages are its speed and accuracy (in relation to the thickness of each layer).
As the finished products are cured from resin, the biggest downside to using the SLA technique is the brittleness of the objects produced.
Stereolithography is ideal for a variety of products in different industries. In the medical field, it can be used for dental products. Additionally, it can also be used for casting elaborate details in jewelry. In manufacturing, it can be used to create and test the form of a car part.
2. CNC Machining
CNC, or Computer Numerical Control, is a machining process that uses computers in controlling machines. It uses a specially made software and console. Likewise, this technique utilizes G-code, which is a language exclusively for controlling the machines.
The process starts with a 2D or 3D CAD (computer aided design) drawing, followed by the creation of a special code for the CNC machine (that it can easily analyze and understand). After which, the program is loaded and then tested for possible errors or problems. It is perfect for those who value efficiency or precision, and those wishing to get their money’s worth. This technique is also good for tasks that require repetition.
CNC machining includes milling (makes use of a rotating cylindrical tool), turning (material is removed by a moving cutting tool while rotating in high speed), and drilling (uses a rotating cutting tool to drill holes).
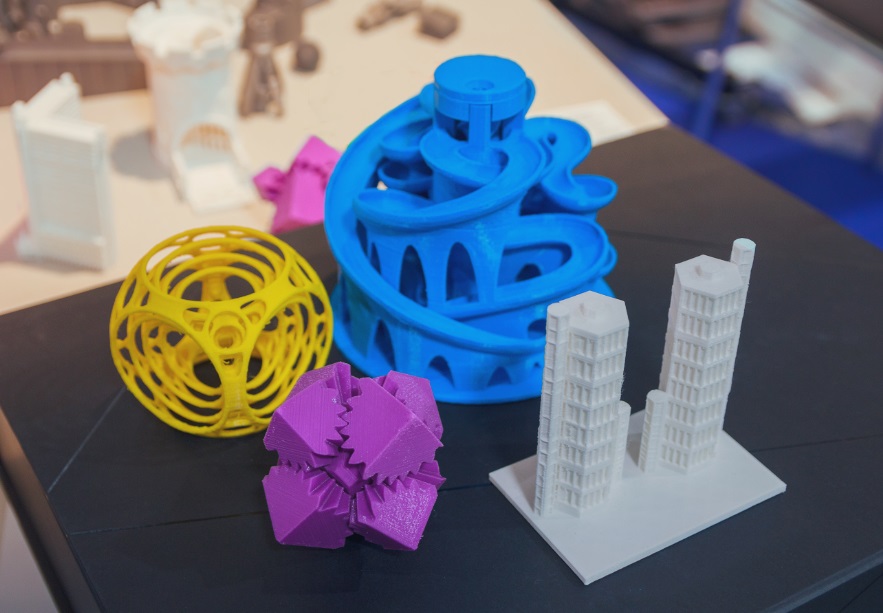
3. AM/Additive Manufacturing or 3D Printing
Use primarily for creating 3D or three-dimensional object, this technique utilizes a computer to control the creation of shapes or objects. Basically, 3D printing uses additive processes. It builds up successive layers of materials in creating the object. The layers are all thinly-sliced horizontal cross-sections. It is a practical option because of its low cost, as well as its practicality as it can be used in the house.
The main disadvantages of the 3D Printing technique include its size (a 3D printer capable of handling large parts is needed), low accuracy and textured surface finish, and its limited options for materials.
3. Conventional Machining
This technique or method uses machines that are created with the help of a person or persons. A good example is small-scale welding. Conventional machining requires physical contact between the material processed or cut and the tool used for completing the cutting procedure.
Machines used can either be numerically-controlled or not. A big disadvantage, however, is that the entire process can take up a lot of time to complete. This should only be used by well-trained, experienced, and highly-skilled machinists.
4. Vacuum Casting
For this technique, the parts are completed by creating silicone molds. A master copy or model is needed, which is then used to produce the silicone molds. Objects that are vacuum-casted are high-quality ones that are suited for a variety of purposes.
Vacuum casting is the best option for those who are looking for a cost-effective and fast option. Additionally, it is also advisable if the intention is to create small quantities of a particular product by making multiple parts. The only downside to vacuum casting is the high cost needed to create silicone molds. If you are wondering of what molds cost like when sourcing, check the video below.
5. SLS or Selective Laser Sintering
Like 3D Printing, Selective Laser Sintering is known as an AM or Additive Manufacturing Technique. Its main power source is laser, which it uses to sinter materials like metal, ceramic powders, and plastic. It is different from SLM or Selective Laser Melting because it does not fully melt the material. What it shares a similarity in concept with is DMLS or Direct Metal Laser Sintering, which uses CAD (Computer Aided Design) data in directly generating prototypes.
The major strengths of Selective Laser Sintering include its high-quality mechanical properties, a vast range of materials, its multi-functional characteristic, and its durability and strength. Its only weak point is having a lesser accuracy rate, especially when compared with SLA or Stereolithography.
These five techniques are used mainly for industries focused on industrial design, automotive parts, household products, consumer electronics, kitchen products, garden tools, office supplies, and medical devices, among others.
Knowing the different types of prototypes; as well as understanding the techniques that can be used in creating a prototype, is essential for anyone involved in design and the product development process. It is especially important for those who are looking for manufacturing centers that can create quality prototypes and put a high value on investments like money, time, and resources. Good prototypes are expected to produce exceptional products.
Before settling down to work on a prototype for a new product, it is important to research all the requirements needed for the prototype and make sure that you take note of all the essential supplies, materials, and tools. Lastly, knowing the steps to take is important in assembling well-constructed and high-quality product prototypes. Should you need help with looking into prototyping services for your product, feel free to contact us.
